
Detecting your Background
When displaying a Video Input, you often need the ability to determine which parts of the image represent the subject (the actor) and which represent the background. MixCast’s solution to this problem is called WildKey, which can facilitate this process no matter where you are in the wild!
There are a number of options regarding how your background is detected, mostly with strengths depending on your circumstances, but the most common are:
- Chromakeying – Best for when you can cover your background with a colored surface like a “green screen”. Doesn’t apply to capturing with the Tilt Five system.
- Depth Keying – Best for when Chromakeying isn’t a viable option and you’re using a depth camera
- Auto-Segmenting (New in 2.5.0) – Best for when Chromakeying isn’t a viable option and you’re not using a depth camera
Select the subsection below to open based on which of these approaches you believe fits your situation.
CHROMA KEYING
Chromakeying is the industry-standard approach to removing the background from a scene, also known as ‘green-screening’. This type of setup works best when you have good control over lighting and can cover a wide area with your chosen colored surface (usually green or blue).
To enable chromakeying, go to the Physical Devices section in the Preferences window and find the WildKey subsection. Next, enable the Chromakeying checkbox.
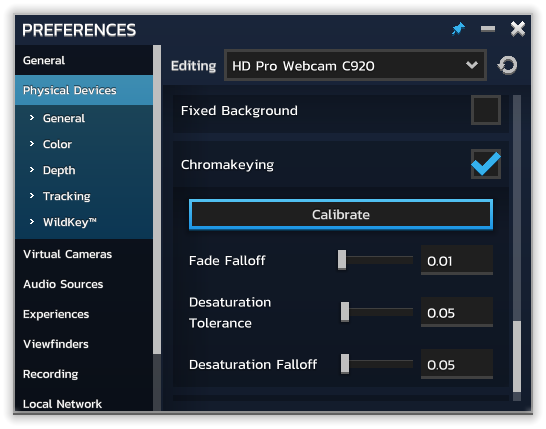
You now need to calibrate the color of the key. Click the Calibrate button and you should see the chromakeying calibration window open.
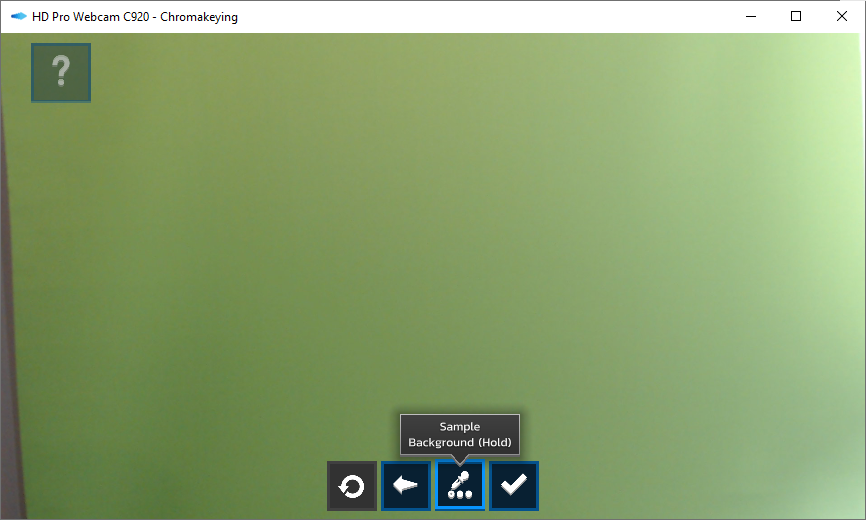
Click the button with the Eyedropper to activate it, then click (and optionally drag or hold down) the left mouse button while the cursor is over an area of the image you’d like removed.
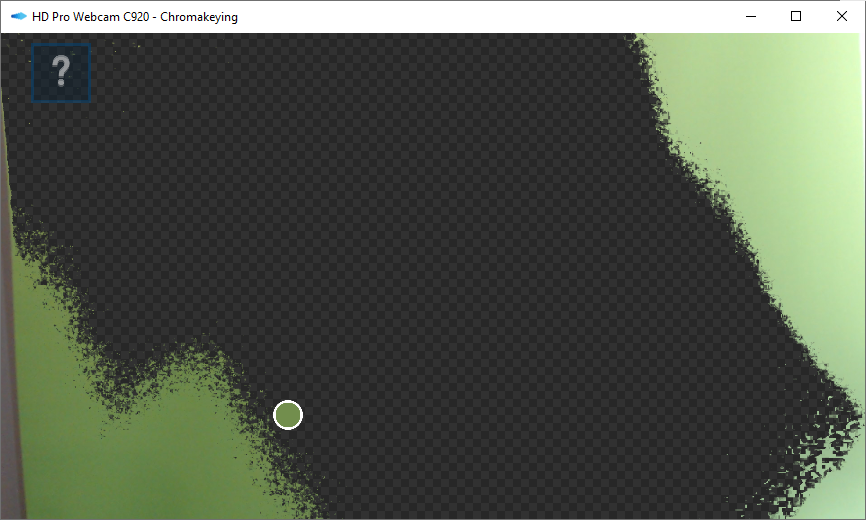
Make sure that any shadows cast on the surface are also keyed by having a placeholder subject stand in the scene and seeing if any areas become visible again.
Once you’re happy with your parameters, click the button with the Checkmark to close the window. You’re now ready to see how to generate mixed reality content!
DEPTH KEYING
Depth keying is our recommended method of background removal when you aren’t able to control the background to the level required for Chromakeying, and is only possible when using a video input with depth-sensing capabilities (see Depth Cameras for more details about supported hardware).
In this scenario, rather than specifying which colors should be recognized as belonging to the background, we use the depth information reported by the video input, either by comparing it to a single input value or by pre-scanning the scene and then treating those scanned depths as the cutoff point.
SINGLE DEPTH VALUE
This method is labelled Depth Cutoff and is better for cases where you have space behind your subject and have a view that is fairly parallel to the floor. To enable this option, go to the Physical Devices section in the Preferences window and find the WildKey subsection. Next, enable the Depth Cutoff checkbox.
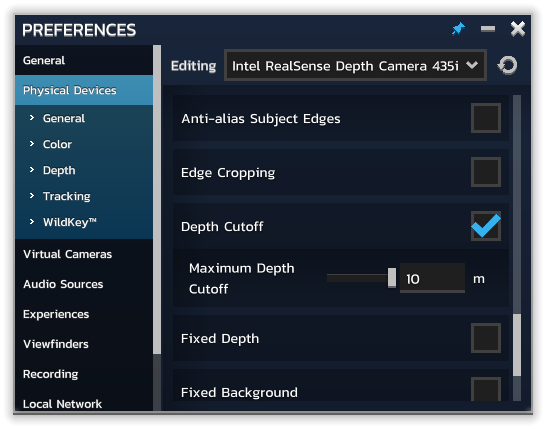
You should now tune the Maximum Depth Cutoff field to produce the best results. It’s best to have an experience running (such as MixCast’s Configuration Experience) so you can monitor the effects of the cutoff value.
You’re now ready to generate mixed reality content! Click here to read how.
DEPTH SCAN
This method is labelled Fixed Depth and is better for cases where you have space behind your subject and have a view that is fairly parallel to the floor. To enable this option, go to the Physical Devices section in the Preferences window and find the WildKey subsection. Next, enable the Fixed Depth checkbox.
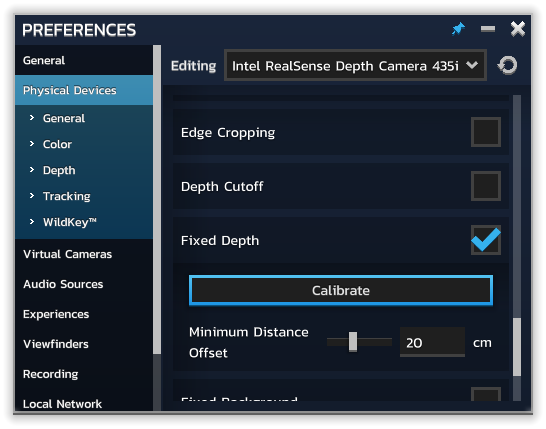
You now need to scan the cutoff depths that MixCast uses. Click the Calibrate button and you should see the Fixed Depth calibration window open.
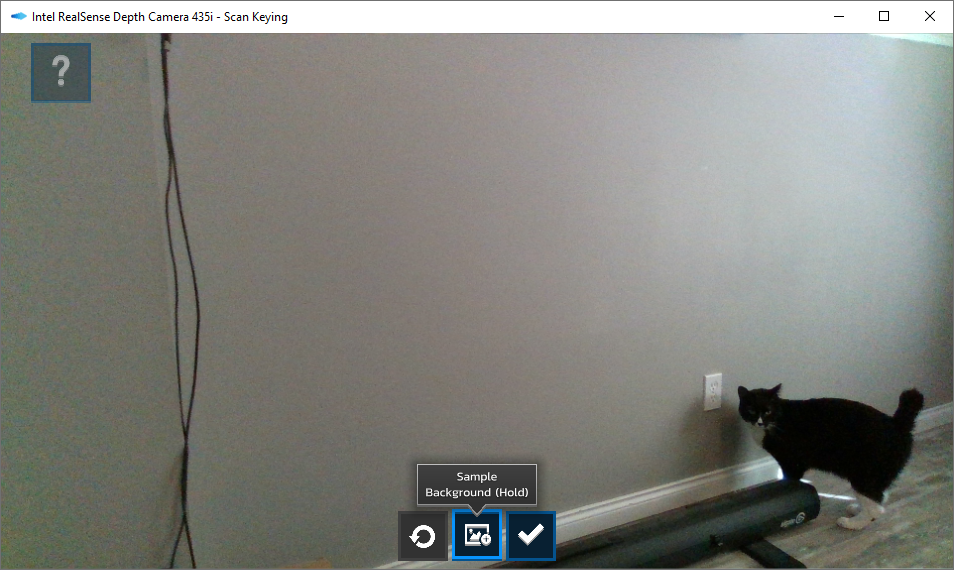
Click and hold the center button, and MixCast will sample the depth values found while the button is held down. You should immediately see the background become hidden, but hold the button down for a period of 3-10 seconds to ensure that any noise in the values has been accounted for.
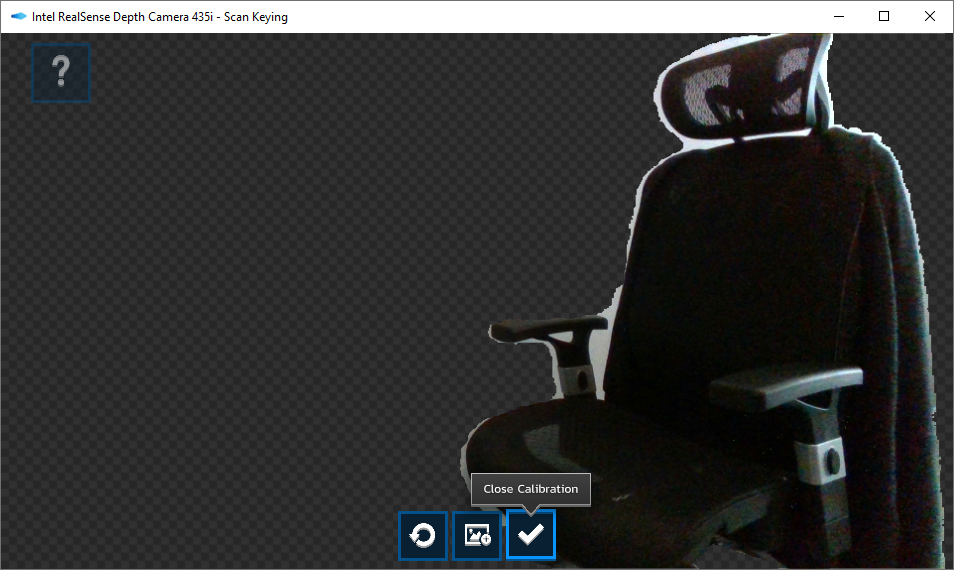
You can test that the depth cutoffs are appropriate after sampling by enter the scene.
Once you’re happy with your parameters, click the button with the Checkmark to close the window. You’re now ready to see how to generate mixed reality content!
AUTO SEGMENTING
Auto-Segmenting is WildKey’s newest trick: analyzing your scene using Machine Learning and determining which pixels contain the user – all without requiring any particular camera hardware. As Machine Learning continues to improve in both accuracy and performance, it was only natural to incorporate this technology into MixCast’s stack!
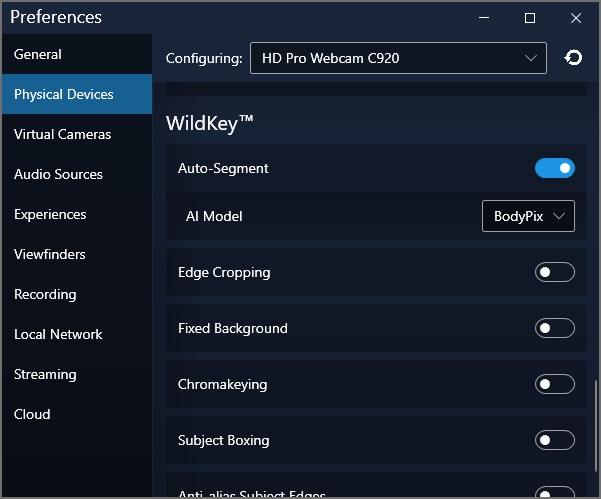
Different algorithms or ‘models’ that produce segmentation information can produce very different results, often based on the scenarios that they’ve been trained on – it’s important to find the model that works best for your setup. MixCast offers 3 different options as far as what model to use so that you can try each and determine which produces the most accurate results:
- BodyPix: An industry-standard model that produces reasonably good results in many situations, including when the user is partially out of view.
- Selfie: A Google-led model that was designed for use with a standard video-call setup – Webcam near eye-level and user seated. Can occasionally produce good results outside that scenario.
- BlazePose: A newer model intended for full-body capture that produces a fairly well-constrained silhouette.