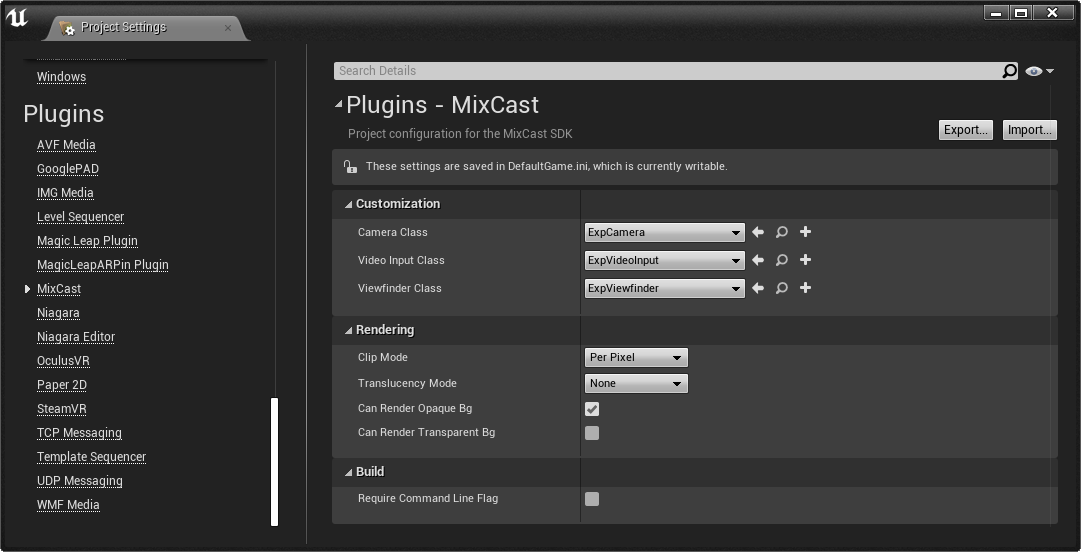
You can access your project’s MixCast Settings by selecting the Plugins > MixCast section in the Unreal Project Settings menu. Don’t forget to use File->Save All if you’ve modified a setting value!

You can access your project’s MixCast Settings by selecting the Plugins > MixCast section in the Unreal Project Settings menu. Don’t forget to use File->Save All if you’ve modified a setting value!

Camera Class: Allows you to override the default Virtual Camera Actor that the SDK will instantiate for the user based on their configuration.
Video Input Class: Allows you to override the default Video Input Actor that the SDK will instantiate for the user based on their configuration.
Viewfinder Class: Allows you to override the default Viewfinder Actor that the SDK will instantiate for the user based on their configuration.
Clip Mode: This option defines how the foreground layer of the experience is generated. Per Pixel means that MixCast can supply a depth value for each pixel of the output and cut off the background precisely based on that data. Planar uses the Global Clip Plane functionality in Unreal to cut off at a uniform depth value. More info here.
Translucency Mode: This option defines how the foreground layer’s translucent objects are handled. Information about how to configure this option can be found here.
Can Render Opaque BG: If enabled, tells MixCast that your experience can render a skybox, etc for MixCast to populate the background of the scene completely. Usually the case for VR experiences.
Can Render Transparent BG: If enabled, tells MixCast that your experience doesn’t have/can hide its skybox, etc so that MixCast to populate the background of the scene from another source (probably a physical video input feed). This allows for what could be described as an ‘AR’ effect within MixCast since there will then only be select virtual props visible in the output.
Require Command Line Flag: This setting being enabled indicates that you’d like MixCast to remain inactive when running the application without an explicit MixCast command line argument being specified (the argument is “-mixcast”). This setting has no effect in the editor.